Thursday, December 31, 2015

My 2016 Goals and 2015 Reading List

2015 was a great year! I’ve worked on some of the coolest projects that I know. I’ve learned the internals on Angular 1.X and typescript. I’ve also started a new job (which is awesome) and made a pivot towards mobile development.


I’m certain that 2016 will be even greater!

Now when 2015 is over I’d like to start a personal tradition for myself in the blog. In the end of every year I’ll set personal goals for the year to come. The goals will cover the blog topics and the desired reading list for the next year. In the end of the next year I’ll go over the goals and verify that I’ve accomplished all of them. I will also list all the books I’ve read in that year so that maybe you will find something that suits you.
 
Let’s Start

This year I wrote 20 posts in my blog which are almost 3 times more than last year!

2016 Goal: Write at least 20 post.

I want to focus on mobile, agile and management topics. I will write on any other topic that I think is worth writing about but these topics will be the core.

Here are some ideas about the upcoming posts:

Mobile oriented posts:
1. TDD in IOS
2. IOS and Android best practices

Agile:
1. The psychology of Scrum
2. Retro done right
3. Agile estimations
 

2015 Reading List

Call me old fashioned but I love reading hardcopy books. My dream is to have a huge library filled will all the best books in the world. I always try to diversify and read different types of books.

I think that I did really well this year and picked awesome books. By the way - this is a great website where you can buy books with free shipping worldwide.

2016 Goal: Read books about management, leadership, innovation and at least one tech book. At least 10 books in total.
 

Here are the books I’ve read in 2015.

1. Steve Jobs – on the greatest minds that ever lived. He had an amazing and not ordinary life (the movies don’t get even close to the real deal). You must read this book if you consider yourself a manager or an entrepreneur.


2. The Last Lecture – an amazing book written by a man that was going to die. This is not one of those books about dying. It is about living. Living the life that you will not regret. The book is about the author’s last lecture which you can also watch here.


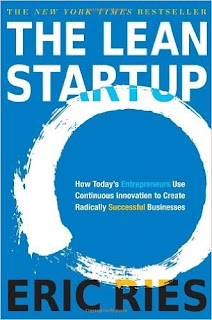
3. The Lean Startup
This is a must book for every manager and entrepreneur. It is well written, pragmatic and has lots of great real life examples.

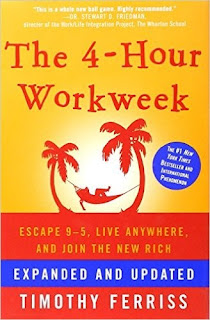
4. 4 Hours Work Week
Life hacker Tim Ferriss in a great book about efficiency and building the life you dream about. It shows that your dreams can be accomplished. Just start and stay focused.

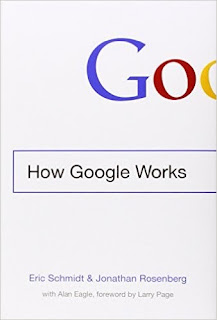
5. How Google Works
The managers of Google share the experience that they gained while working in Google.

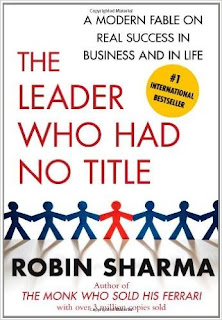
6. The Leader Who Had No Title
Robin Sharma is one of the best leadership and life improving authors that I’ve encountered. I enjoyed reading all of his books. In my opinion this one is not as good as the “leadership wisdom” but it has lots of great topics in it (just read both).

7. Start-Up Nation
Great book that tries to determine how a tiny country like Israel has the largest amount of successful startups in the world.

8. The Passionate Programmer
Actually that is not a good book. The title doesn’t fit the content. It’s mostly about how not to lose your job. Don’t read it.

9. מחשבות לעט לילה
Haim Shapira writes about three philosophers: Nitsche, Schopenhauer and Kierkegaard. How did they live, what did they believe in and why? Very interesting.


10. High Output Management
Andy Grove’s book that is considered to be the Holy Grail of management books. It was written in 1983 and it is still accurate for this day. He covers all the aspects of being a manager. Great book, it’s a must read.


Allow me to repeat the 2016 goals:
1. Write at least 20 blog posts.
2. Read at least 10 books.


I like these goals :)

Now it’s time to start working on them.
Have a great year!

Saturday, December 5, 2015

Everybody has a plan until they get punched in the face

“A failure” can be a result of a software or hardware problem. A fault tolerance design intends to enable the system to continue operating properly in the event of failure. In this post, I’ll talk about a way to treat a special cause of failure – a timeout using a really cool open source framework named Polly.
We prepare for failures, we put “try catch” blocks and check “if(something == null)” every now and then. We think we’ve got it covered and that we are fully protected.
As Mike Tyson said – that’s our plan. However, we all know that something “unpredictable” will always go wrong, and then we’ll be punched in the face.
clip_image002
Let’s say that you have a DB and you query it to get some data – user’s navigation history for example.
clip_image004
One of your users clicked to get his navigation history and waited for almost a minute (yes – that’s a long time) to get an error that crashes the application!
clip_image006
(BTW This not a great error page – read here about the importance of error pages that make your user smile.)
You guessed right – that was a timeout to the DB. Why did it happen? Who cares? It made your user wait and eventually it crashed the application. This is unacceptable!
How can we handle it?
There are two problems in this scenario: the first is that the application crashed and the second is that the user waited a minute for a response.
Let’s start from the crash. The navigation history is a cool and useful feature but it’s not the core of your system. The core feature is the navigation itself. You have to identify the core features of your application and make them work, even if some other features fail.
In this example, the application should have displayed an error message saying something like “History is currently unavailable – try to remember where you went” and allow the user to use its core features any way.
Now let’s deal with the fact that the user had to wait for a whole minute before he saw the error. That’s a horrible user experience. A timeout might happen due to many reasons in any sort of client server communication (no more available connections, waiting for a really long operation to finish or simply a stuck component).
The bottom line is that someday it will definitely happen to you! Furthermore it will cause all your users to wait until they receive the error. A timeout may accrue just once due to a race condition that only a single user will get. However, sometimes the timeout will remain until you manually fix the problem - which can take a while.
You can lower the timeout limit to a second or even 100ms - and indeed no user will wait longer than 100ms - but all the users will wait for 100ms and eventually fail, while choking your servers.
Your goal is to prevent users from waiting at all when you know they will definitely receive a timeout. In other words, if a system component has a timeout,  you don’t want the application to try to communicate with it. You want it to fail fast.


Fail Fast

Fail fast is a concept in fault tolerance systems that is designed to stop flows and normal operations when a possible failure might accrue. Such design will add check points before operations execution, which will check if the operation is “healthy”. Using “health indicators”, the system will know if a certain operation will most likely fail. If an operation isn’t healthy, then there’s no need to execute it and we’d rather call a fallback behavior.
image
This way, we may give the users a better experience then waiting for an error.
Let’s examine our case: the application shouldn’t try to execute the query unless the connection to the DB is “healthy”. So the system will check the “health indicator” before the execution, and if it returns false then it should immediately turn to the fallback and display the error page without even trying to connect to the DB.
You can take it even further – if such health indicators exist, then why can’t we check them on the application startup? If there’s a problem with the feature, then let’s disable it and even not show it to the user. Perhaps it’s better to make the feature “disappear” then exposing the user to a poor experience. That of course is a pure business decision (it might be a really poor experience if the messages tab in Facebook suddenly “disappears”).
Allowing your system automatically to disable features must be done extremely carefully. You don’t want to disable a feature for all of your users if for some reason a timeout has accrued just once. If it happened 10 times in a row, then most likely there is a real problem and only then should the feature be disabled.
 

Polly

Polly is a really cool and useful open source that helps you create a fault tolerant system using policies for handling exceptions and creating fallback solutions. Let’s see how we can use Polly to handle our timeout scenario and allow your application to fail fast.

NavigationHistoryController has a dependency to the database where the navigation history is stored.
It has a single public method, which provides the history by calling the INavigationHistoryProvider.
We have a try-catch surrounding the provider call. As we know this catch will eventually handle the timeout exception, but it won’t fail fast.

We have created a circuit breaker policy on the timeout exception (error code -2) setting the count to 10 and the policy duration for 10 minutes. In other words, our policy will be triggered if a SqlException will accrue 10 times and in the next 10 minutes every call to the provider will not be executed. BrokenCircuitException will be triggered instead, allowing us to quickly fallback and return an error without waiting for the timeout.


Let’s test it

We’ll mock the NavigationHistoryProvider and raise an exception for every single call to it “Get” method.
We’ll call it 10 times and then another time to check if the policy was activated.

Works like a charm. The code is available on GitHub.
 

Conclusion

The applications that we build will have failures. We must recognize that things won’t always fail nicely. We must be prepared for all the possible scenarios and edge cases. The sooner we start thinking about them in our development process – the better.
I encourage you to think about it from the beginning. Start using FDD – Fail-Driven Development.


Best of luck.

Wednesday, November 25, 2015

Applying TDD in Your Company is More Important than Ever!

I won’t cover the basics of TDD. I do want to talk about the advantages of writing automated tests (unit tests and integration tests) in general, and why applying TDD ,with a little twist, should be a standard in your company.

First, why should you write automated tests?

“In order to test and verify my code?” Daaahh! This is so obvious that it’s not worth mentioning! I think that unit tests and all kind of automated tests have many more benefits than just testing your code.

Better code design – If you have ever written unit tests, you’ll know there is no (pretty) way of testing or mocking static objects and tightly coupled classes which violate the SOLID principles. A testable class is a well-designed class that is loosely coupled from its dependencies, uses dependency injection and rarely has calls to static methods. A testable class is a SOLID class which will improve maintainability, readability and extensibility.

True documentation of the code – You’ve probably written a design paper at least once for a feature or any sort of documentation describing the code. Be honest – is this documentation still relevant? Does it really describe the code that is now in production? Probably not. The automated tests, on the other hand are the true documentation - since if the code breaks the tests, the code will be repaired or the tests will be modified to support the new behavior that has been added. Either way, the tests tell the real story of the class, allowing any other programmer other then you to quickly understand what the class does and how it behaves in different situations.

Killing the fear of change – One of the programmer’s greatest fears is the fear of changing code. You never know which class depends on this specific implementation in a specific scenario. Usually, QA will let you know about it. But not your company QA – your customers (the real QA), who will get hurt and be angry due to your changes. However, if the code is fully covered with automated tests then there’s no fear! You can add, modify and even, so help me god, delete code - and in a matter of a few minutes you’ll know exactly what logic you broke, and why (the tests assertion should be really clear).

A standard for your company

Your company is a business. It has competitors who are breathing down your neck, trying to get hold of your customers. Time and quality are crucial! You must deliver new features fast and with the highest quality so that your customers will be satisfied.

The only way to succeed is by writing automated tests that cover your entire code base and all the user flows. By doing this, you allow every single developer in your company (seniors and juniors) to quickly understand how the code works by reading the related tests, easily changing the code - since it has a great SOLID design – and having immediate feedback if any modification has ruined the existing logic, providing the exact places where it happened. This saves time and money, and should be the standard for every new feature in your product. It should be a fundamental principle for writing code in your company.

Why TDD? Just write the tests afterwards

Why should you use TDD if you can first write all the necessary code, implement the feature and only then write the tests?

Writing tests after implementation is way better than not writing tests at all. However, it might not get you the same effect as I’ve described above. When you are finally done with the implementation, the thing you want the most is to declare the feature as “done” and ship it to production. You probably won’t invest enough time in fully covering the feature with good, meaningful tests. If you encounter something that is fundamental in your implementation that is not testable, you will probably just leave it like that and not change it - leaving it untested.

The last thing is that you are biased toward your implementation: in your opinion, the way you’ve implemented the feature is the right way. Thus you will write tests that support your implementation and not necessarily cover all the edge cases and business goals that the feature was supposed to do.

TDD – the cherry on top

In order to truly enjoy the benefits described above you have to apply TDD -with a little twist:

First, start with an integration test for your feature – a test that will fully test the behavior of your feature. Some might call it “Behavior test” as in BDD. I think that is just semantics.

If you are fixing a bug, your tests should create the environment where this bug is recreated and test that the bug is prevented before you’ve actually fixed it! You want to be sure that you are able to reproduce your bug. Only then can you start actually fixing it by writing the tests first. Same goes with a new feature - first an integration test that checks the behavior of your feature, and only then begin to implement.

This way, you begin with the business goals and stay focused on them while you implement the whole feature.

Another great benefit in starting with the integration test is that you will have to create the setup for the feature. Doing so will make you truly understand how the feature works and on what it depends on. This is crucial before you start to implement, so you won’t make unnecessary mistakes.

It’s not easy: it requires strong testing infrastructure and patience – it’s hard to hold back the lines of code you are just dying to type. But it is so worth it.

If you want to easily write code at your company and not be woken up in the middle of the night to solve a bug in production, just write the tests. Better yet – start with them.

Sunday, November 15, 2015

Local Images in React-Native IOS

Looks familiar?
There are several ways to use local images in a react-native app:


  1. Using xcassets folder - source={require('image!bg')}. The images must be in the xcassets folder and according to the docs you should have the image in all the 3 sizes.
  2. Relative path - source={require('./bg.png')}. Note that you have to add the file sufix.
  3. The way it actually works - source={{ uri: "google", isStatic: true }} instead of require('image!google'). This way you can use both images that are in your xcassets folder and those that are not without killing yourself while trying to find the right relative path.

If you got here then you've probably started to use React-Native - don't give up yet- it's awesome!

Wednesday, October 28, 2015

6 Ways to Make Your User Smile

In the past few years UX gained focus targeting simplicity and clarity in the user interaction with the application (mobile and web). The long registration forms have almost disappeared, the office like toolbars are gone and so is the load of unnecessarily information on a single page. The important buttons became larger and more noticeable in order to guide the user for his next action. There is no doubt that these changes improved the user experience with the applications. The absence of this UX principles became a major factor in the user’s consideration for choosing a certain app over another.

Simplicity and clarity became common UX practices along the different apps. The user has a variety of application serving almost the same purpose and he is free to choose whatever he likes. So how could your app be special and become the users favorite choice? The answer is quiet surprising - your app must be fun!

The user should remember the interactions with your app. It should make him smile, it should make him say “wow!” and sometimes it should even make him laugh. If the interaction is special and exciting not only it will make the user to come back it will also make him kindly tell his friends about that “super cool” app that made him laugh and that they must try it too.

Do your users have fun or are they excited when working with your app? Do you have a user story in your backlog with a “should make the user smile” definition of done .Take a look at these 6 ideas:

1. Animations

2. Easter eggs

3. Predict the user actions

4. Gamification

5. Since you’ve been gone

6. Interaction as a relationship

Let’s dive in:

Animations

An animationless app is a boring app! The users expect live interaction, moving objects, flying adds and real life behavior while they are interacting with an application. Take a look at famo.us framework which allows you easily add animations to basic content pages and make them look awesome. Try to imagine how should the page/dialog/alert/form interact then it appears or disappears. Slowly fades away, moves to the right until it’s gone, falls from the top, increases font size, changes color and many more. Don’t push it – be cool.


Easter Eggs

Easter eggs are unexpected behaviors when the user does something in the app.. Take this logo for example:

clip_image001

That’s just cool! I found myself spending few minutes watching the dinosaur does “raar” when I hover the logo. It is so easy to create and it will certainly make your user smile. The best Easter eggs I know are actually on Google. Try typing “zerg rush” or “Atari Breakout”. Another possible and pretty cool Easter Egg is the error page. An error page is the worst thing that can happen during the user’s interaction. So we almost ought to make it fun.

clip_image003

Take a look at this site for some crazy ideas.


Predict the user actions

Which app will you prefer? A regular one that just allows you to do stuff on it or a smart one that seems as if it thinks and tries to understand and get to know you? The users want the second one.

clip_image005

Are you familiar with Waze?

When you open the GPS navigation app Waze in the morning it automatically asks if you are driving to work and in the evening whether you are coming back home. That’s just adorable, it’s like it knows me J

Think about the waze (I meant ways) that you could predict your users. If your app allows them to order something then perhaps the next time the user logs in it will automatically redirect him to the order status page and focuses on the user’s order.

Try to make the users think that your app cares about them, tries to learn them and to save them time.


Gamification

Everything is better when a game is involved. It’s human nature to try achieving a goal or a target. To try being the best in a group. So when the users have goals, targets and achievements to unlock they will want to do them. This way you can make them use all your app’s features while you guide them towards some achievement, stay longer online and insure that they’ll come back for more.

You can add levels, prizes and categorize your users. You can present them gifts when they level up or unlock some sort of achievement. Let’s say you want to give some user a coupon or a discount for his next purchase, so why not making then answer a trivia quiz or play a minified version on candy crash inside your app in order to win the discount (you can give it to them even if they lose)?

clip_image006

Linkedin ranks you profile, the more details you add about yourself the higher your rank is.

clip_image008


Since you’ve be gone

Nowadays almost everyone is doing continuous delivery. You add new features and change existing ones on a daily basis. How would the user know that his favorite app has a new feature or better yet how would he know that his favorite feature has changed?

You want to make the user feel comfortable with changes. Take a look once again at Google:

clip_image010

clip_image012

Feels familiar? Google always keeps us updated so that we will never come back to our app and not know how to use it.


Interaction as a relationship

You will always remember the first kiss with your love one, your first date, first vacation and more. They were special. How about making the first interactions with your app special? The first login, first purchase, first comment, the 10th whatever. Make these simple actions meaningful and special. From time to time remind them of those special moments. Your users won’t believe it, they will adore your app and remember it for good. Take facebook’s ”on this day for example when it reminds us the stuff we did exactly 5 years from now.

clip_image014

Special day in deed.

How does it help your app? It doesn’t. It just makes it special. And that’s what counts.

That’s my six ideas that I think will make your users laugh and smile. I’m sure that there are many more ways to achieve it. Feel free to comment and share your ideas.

Best,

Dennis

Wednesday, August 19, 2015

Creating Masked Input Directive with TDD–part2

In the previous post we started implementing the masked input directive. We’ve written tests and the implementation of the directive’s controller. Now it’s time to add the directive itself and of course we’ll start form the tests.

Testing the directive means testing it’s interaction with the UI. These are your integration tests. We’ll want to test the controller logic and the way it reflects in the UI.

First we’d like to test that the directive’s isolated scope has the provided “mask” and “skip” values (keep in mind that in a real application you would test the existence of all the DDO values):

image

Some key notes from this test:

1. In order to test a directive we must create a string that represents its DOM (an element which has the directive attribute i.e.).

2. $compile service parses the element’s DOM and executes the directive function with the provided scope. So the “element” variable is now the directive with all its properties and methods.

3. We can access the scope properties using the element’s “ísolateScope” method.

Now let’s define the DDO:

image

Then we’d like to test that the element’s value will have the provided mask value after the DOM compiles.

image

And now with the link function:

image

In order to change the UI (the element’s value property) you have to call to $setViewValue that is a special angular method that is in charge of setting the value property of the directive element (<input type=”text” value=”this one”/>). $render is called for the UI changes to take place.

Now we add the directive to an html file and actually see all the stuff that we were testing. Add an index.html file, include angular and all the client folder except the spec files!

image

Run it:

clip_image002

That’s what I’m talking about!

All that’s left is connecting our tested (TDD baby) controller functionality to every time the user presses a key.

image

I’ve created a keydown event using the private createKeyDownEvent method and fired it.

The implementation:

image

We subscribe to the keydown event, get the new char, call editMask and if successful re-render the UI.

That’s it! You have a functional masked input element which is fully tested.

clip_image002[5]

As you can see, writing TDD with angular is extremely easy and straight forward. If you are not writing tests then you most definitely should! Just begin, it’s worth it.

Have fun TDDing,

Tuesday, August 18, 2015

Creating Masked Input Directive with TDD–Part 1

In the next two posts I’d like to show you three things:
1. What is a “masked input”.
2. How to create a masked input custom angular directive.
3. And the cherry on top – implement it applying TDD!
So what it is “masked input”?
It allows users to easily enter fixed length input where you would like them to enter the data in a certain format (dates, phone numbers, ids, credit card number and more).
Most of forms out there don’t supply the users any hints about the data’s format and make the users guess it (most of the time the input fields will be  blank textboxes). If there’s a format mismatch then the user will receive an error and will try again.
Using masks allowclip_image003 us to show the users the exact format and force them to enter it correctly.
Let’s implement it!
Remember that we’ll do it using TDD.
So first let’s define the desired API:
image
We want to create a custom attribute directive that will have three properties:
1. Mask – the mask that the user will see in the textbox. These values will be replaced by the user’s input as they type.
2. Skip – an array of chars that we want to be left along with the user’s input like ‘/’ in a date textbox – 01/06/1991
3. Ng-model – the associated model from some controller.
Great! Now after we know our goal we can start writing code.
1. Create ASP.NET Web API project
Add the following nuget packages:
- Angularjs.core
- jasmineTest – this is the jasmine.js testing framework for ASP.NET MVC
- angularjs.TypeScript.DefinitelyTyped
- jasmine.TypeScript.DefinitelyTyped
The last two packages include definition files used generally for TypeScript for the 3rd parties intellisense. However I found that even if you don’t write TypeScript there intellisense is pretty helpful.
clip_image002[6]
Now let’s add a Client directory, index.html file, app.module.js, app.controller.js and a InputMask directory (all the angular code is style accordingly the John’s Papa style guide).
clip_image004[6]
2. Enter TDD
Before we implement the controller we’ll add a spec file to test the controller, we will add a basic test, let it fail and only then implement the controller and the module.
Add a form.controller.spec.js file (this is a style guide naming convention, formControllerSpec.js is also fine). Now we’ll add a basic jasmine test for testing that our controller is defined.
image
Nothing special here: we inject the $controller service in order to get our controller, inject it with a new scope and assert that the controller is defined.
Now let’s add all the files into the SpecRunner.cshtml file:
image
I’ve added angular, angular.mocks, the module and the controller.
The test fails since there’s no module or a defined controller– let’s add them.
First the module:
image
I’m using IIFE to prevent my functions getting into the global scope and prevent the tests get to my private methods.
And the controller:
image
I’m using the $inject pattern in order to make sure that my controller parameters won’t get ruined after minifying the code.
Let’s run the test:
clip_image002
Now let’s add another test to validate that the scope works:
image
Notice that even in js tests I still use the AAA pattern. It makes the tests readable, especially when they get complex.
Run and pass:
clip_image002[5]
1. Adding the directive’s controller
The logic regarding the mask’s chars replacement will be inside the controller (the logic regarding the display will be inside the link function. We’ll get there later).
Add an InputMask directory and place the controller and its spec file in it:
clip_image004
And the first test:
image
I’m placing the specs files near the source files so that the specs will be immediately noticed when someone looks at the solution and so that it will be extremely easy to see that a file is lacking its tests.
Add the controller and the test will pass.
Now let’s start adding some functional tests.
Every time a user enters a letter a controller function must be called in order to edit the mask, it will check the current input length – it shouldn’t be longer than the defined mask and it should replace the mask characters while skipping the values provided in the “skip” array.
Let’s go:
image
And the implementation:
image
Replacing the mask as the user enters input:
image
Notice that the controller sets the ngModel with the mask value on its initialization. We’ll provide the mask value for the ngModel before calling for the editMask method from out test.
The implementation:
image
Now let’s add a test and its implementation for the “skip” characters functionality.
Test:
image
Implementation:
image
Pretty straight forward. Notice how the controller doesn’t do any UI logic– just the way it supposed to be.
In a real life application you should add as many test you can for your controllers in order to achieve maximum code and use cases coverage, in this post (which is already quiet long) we’ll stop here and move towards the next topic – testing the directive.